


Some of you may know that one of my glorified hobbies is the reconstruction of prehistoric (and speculative) animals. I collect all such work at a dedicated illustration blog, where over the years, I have developed a unique and colourful technique to realistically render such "lost beasts."
Recently, inspired by the online art videos of a fellow palaeo-artist, I wanted to compile a tutorial on how I make such images. Here we go then, with a step-by-step explanation of a new illustration I made just for this occasion:
Recently, inspired by the online art videos of a fellow palaeo-artist, I wanted to compile a tutorial on how I make such images. Here we go then, with a step-by-step explanation of a new illustration I made just for this occasion:

I wanted to illustrate a lesser-known plant-eating dinosaur, the truncated-looking Brachytrachelopan mesai of Argentina, a strange off-shot from the lineage of long-necked, plant-eating sauropod dinosaurs.
As in all palaeoart, this one began with a search for skeletal drawings. You can't really ball-park wildlife art, living or extinct. Without a proper skeleton, the results will look... off. That being said, you shouldn't simply trace skeletal drawings and drape skin over them either. I found my skeletal of Brachytrachelopan from among the work of Lukas Panzarin, a master palaeoartist from Italy.
As in all palaeoart, this one began with a search for skeletal drawings. You can't really ball-park wildlife art, living or extinct. Without a proper skeleton, the results will look... off. That being said, you shouldn't simply trace skeletal drawings and drape skin over them either. I found my skeletal of Brachytrachelopan from among the work of Lukas Panzarin, a master palaeoartist from Italy.

I downloaded the skeletal drawing, opened it on Photoshop CS6, and placed it on an A3-sized black-and-white image at 300dpi resolution. Now is the time to "pose" this thing.

Yep - skeletals can be "posed" with a simple trick involving selections with the Lasso Tool. Draw around the shapes of individual bones, cut-and-paste them as separate layers and then rotate them in order to make your creature move. When rotating selections, you will also notice that you will be able to move the axis of rotation around - see the little cross-in-circle figure indicated with the arrow.

This will make "posing" individual bones much easier. Animals move around in a lot of strange poses, but also remember to make it realistic, balanced and evenly-weighted. Errors of balance and posing can be quickly noticed if you flip the image left-and-right. Posing is also a matter of style and originality, it'd be too easy to simply copy a skeletal drawing in the exact pose it was rendered. Believe it or not, there was once an incredibly petty and protracted debate among dinosaur artists because of this very reason.

Here is what the skeletal looks like after posing it for a bit. I moved the tail, legs, backbone, neck and forelimbs and made the dinosaur stand up on two legs, as if it was rearing briefly to browse, or look around.

Ok, now comes the "real life" part. Enlarge your drawing so that it fits a full A3-sized page. It's good practice to make the "main body" of the animal as big as possible. You can split any protruding parts like tails, necks, etc. model-kit-style to better fit your sheet of paper. Now, set the opacity of the drawing to 20%, 15%, so that the black bits show in very light shades of grey...

The reason of the light tone is that you'll be drawing on it in a little while, and you don't want the reference image getting mixed up with your lines. Print the drawing on an A3-size paper...

...and go to town on it with pens. At this point, each artist will have his or her individual style. I'm not much of a fancy-pen-and-marker-nut when it comes to pens, some of my favourites have been stolen from hotel lobbies, friends' desks, and so on. I use thick, ordinary, ball-point pens for thick lines, thinner, pigment-markers and gel-ink-pens for smaller details. As long as the ink is black, they will do the job.
(Alternatively, you can skip the pen-inking phase and just draw digitally over the bones, using the Pencil Tool at sizes 3 to 5. I used to work in this style, but the results took much longer, and seemed a little stiff and lifeless.)

(Alternatively, you can skip the pen-inking phase and just draw digitally over the bones, using the Pencil Tool at sizes 3 to 5. I used to work in this style, but the results took much longer, and seemed a little stiff and lifeless.)

Now comes the really fun part. Use your light skeletal as a reference and render it with flesh, muscles, integument and shading. If you make any mistakes, don't worry, just indicate them with arrows and brief notes, and you'll fix them in post-production.

This is also the part where knowledge in palaeontology, zoology and current debates in these fields really comes in handy. If you've noticed, I've given the animal a soft-tissue "lump" over its nostrils. These types of plant-eating dinosaurs, the sauropods, had strangely-located nostrils that almost certainly supported some sort of soft-tissue attachment. No one knows what exactly these structures were, (elephant-like trunks were even suggested), but there was definitely something there. I took the speculative liberty of giving it a resonating vocal organ.
I covered the neck, body and the tail with much thicker muscles than one ordinarily sees in most dinosaur reconstructions. Another speculative, but plausible addition was the integument, a series of stud-like protuberances that stretched across the animal's body. I also gave the animal a broken (and healed) set of bones in its tail. I think that this type of speculation is the heart and soul of accurate palaeo-art. I can write much more about "plausible speculation," but you can just read my book on the subject, too.
I covered the neck, body and the tail with much thicker muscles than one ordinarily sees in most dinosaur reconstructions. Another speculative, but plausible addition was the integument, a series of stud-like protuberances that stretched across the animal's body. I also gave the animal a broken (and healed) set of bones in its tail. I think that this type of speculation is the heart and soul of accurate palaeo-art. I can write much more about "plausible speculation," but you can just read my book on the subject, too.

Here is the finished line-work. It has a number of small mistakes I'm not too happy with, but we'll correct them soon.

Now, scan the image back, in the highest resolution available. I scanned mine at 600dpi, in A3-format. The resulting image was quite big.

Ok, now comes the magical moment: How to translate your pen-work into a congruent digital drawing? There should only be two colours, white and black. No intermediate tones, no anti-aliasing, no dust, no freckles, no nothing. At 100% resolution, the image should resemble a work of pixel art. In this quest, your biggest ally in Photoshop is the Threshold Tool, under Image / Adjustments, which will do exactly that.

Use the Threshold Tool to clean out your image.

You will notice that the Threshold Tool will not clean things out perfectly, but will create a lot of dust-like artefacts and noise around your lines. These are shoddy and undesirable. Eliminate them by using the Median Effect under Effects / Noise, at a resolution of 3 or 2 pixels. After this step, make sure to use the Threshold Tool again, because the Median Effect will also leave some greyish artefacts around your lines.

The rest of the cleaning, you will have to do by hand. Here is how the image looks when cleaner. I also connected the "model kit" tail with the rest of the body.

Now is the time to perform the corrections I'd jotted down on the sides of the drawing. For example, the lump of fat and muscle I'd placed under the tail was too much, even by All Yesterdays standards. I pushed it back by using the Liquify Filter, freeze-masking the areas that I want to stay constant. After the filter, I used the Threshold Tool again, to remove the greyish impurities created by the Liquify function. I can't overstate the need to use the Threshold Tool over and over again, every time you apply a non-standard filter to your image.

The rest of the "gigs" I clean with the Pencil Tool, set to pure white. You can also use the Eraser Tool, but make sure you set the Mode to Pencil, not Brush. Using the Eraser Tool in Brush mode will result in messy edges.

I also had to move and shrink the creature's ear. I did this with a quick flick of the Lasso Tool, the same selection tool I used to "pose" the skeletal drawing. As always, Threshold afterwards to clean up the mess caused by re-sizing the portion of your image.

Here is the fully-cleaned Brachytrachelopan, with an inset of its head. I spent a lot of time cleaning parts of the head and the body. Sometimes, even the thickness and angle of an individual line, or hatching, can put the whole image off.

Now begins the colouring process. One of the neat tools that can help you at this junction is the PaintsChainer online tool that uses some sort of Neural Net AI to automatically colorise your images. In some images, it's hauntingly effective. In other cases, you can give "hints" to PaintsChainer to better come up with colour schemes.


Here are some of the neat images generated by PaintsChainer for my Brachytrachelopan. I was really fond of the pinkish tones in the final image. Machines have made unnerving process in our age, but they can still not create the final, completed pieces. Use software like PaintsChainer only as inspiration, never as actual, finished work.

Also, don't forget that all artists stand on the shoulders of giants. I routinely research the work of nature illustrators, especially bird artists, to provide me with inspiration and knowledge for the colour schemes, poses and composition of artwork featuring dinosaurs. Here is a screenshot from my research into the work of Louis Agassiz Fuertes, a celebrated American ornithologist.
Always hone your research skills, and always learn from the work of others. In the future, with machines handling more and more of the scut-work of art, an artist's knowledge and research skills will give him or her as much an edge as their technical abilities.
Always hone your research skills, and always learn from the work of others. In the future, with machines handling more and more of the scut-work of art, an artist's knowledge and research skills will give him or her as much an edge as their technical abilities.

Ok, now let's get ready to colourise. Choose the Paint Bucket Tool from the sidebar. Most importantly, make sure the Tolerance level is set to 0, and that Anti-aliasing, that damned gimmick of mediocrity, is switched off. This will help your colours and lines stay crisp and undamaged throughout the colourising process.

Pick the colours from your PaintsChainer images and research pictures, and fill out the background first. You'll notice that I picked the background colour from the sky in Agassiz Fuertes' image. Then, switch the Contiguous function off from the Paint Bucket Tool control bar, and fill in the main body of the animal in one deft move.
Also, and this is very important; fill the colours of the lines in a dark hue as well. They shouldn't stay black just because they are lines. Try dark blue, dark green... sometimes, even lighter shades may work surprisingly well.
Also, and this is very important; fill the colours of the lines in a dark hue as well. They shouldn't stay black just because they are lines. Try dark blue, dark green... sometimes, even lighter shades may work surprisingly well.

Experiment a lot with colours before deciding on the final "base" plan. Here are four screenshots from my process. In fact, I usually leave a day between the drawing and the colourising phases to get a better pick of colours, rethink things and make a few last-minute adjustments. As that old geezer in Toy Story 2 said, you can't rush art.

Ok, now it's the second day at work on Brachytrachelopan, and we're getting ready to paint our figure.

The whole reason I've avoided anti-aliasing and unnecessary colours now becomes apparent. To colour the entire figure, select the base colour of the beast with the Magic Wand Tool, at Tolerance set to 0, and the pesky Anti-alias and Contiguous functions switched off. Now you've selected the entire base colour, without fearing to "spill over" to the edges, or the lines.

Now it's up to your manual skills, only on a tablet this time. I've used the same Wacom ET-0405A-U tablet since 2003. I've used the Cintiq devices too, they are damned effective, but cumbersome and baroque in long-term operation. As far as I'm concerned, (but opinions can differ), the larger, screen-less tablets, and the new fancy "Bamboo" tablets, with their unnecessarily smart functions, are all a bit worthless.

Ok, now select the Pencil Tool, shift the Opacity setting to anything between 60% and 10%, and start layering in colours like a series of transparent curtains, moving from the head of the animal to the tail region. Use low opacities and multiple strokes for smoother transitions, higher opacities for steeper transitions. After the main gradients, move in to focal areas such as eyes, wattles, mouth parts, display structures, sacs, etc. for detail work. If you are feeling bold, you can even re-paint the entire body, scale-by-scale. Needless to say, it takes a bit of expertise to build-up one's colourisation skills in this manner.

Here is my Brachytrachelopan with its base colour scheme. It's starting to look like a strange bird-thing and less like a big lizard, which is exactly the angle I was going for in this illustration. Always use a lot of research for coloration, but consult, never copy. Ideally, your animal should have a natural-looking colour scheme, but it shouldn't be a copy (a "skin-job") of an extant animal, it should look like its own thing.

At this point, the speculative mind-set is also very useful. Imagine how your animal would have lived. Brachytrachelopan was a "small" sauropod dinosaur, perhaps living in the forest itself, much like a tapir or an okapi, while its titanic relatives grazed on the plains or on the edges of gallery forests. Ergo, I figured that it may have had a pattern of strange spots to break up its outline in the mottled undergrowth forest.
I rendered the spots by opening up a new layer, using the Magic Wand Tool to select everything that is not the background and the line colour, and individually drawing the markings. Once again you shouldn't half-ass the patterns and just use a texture - trust me, it will show.
I rendered the spots by opening up a new layer, using the Magic Wand Tool to select everything that is not the background and the line colour, and individually drawing the markings. Once again you shouldn't half-ass the patterns and just use a texture - trust me, it will show.

I made the spots on a separate layer, because I could manipulate their opacity, or change their colour afterwards.

Flatten the layers, tweak a little with the Hue/Saturation, Curves and Levels settings, and you are done! Or are you? So far, the Brachytrachelopan drawing took up something like six or eight hours of work, spread over two days. It looks very pleasing, but I want to further convey that this was a real animal that once walked on this planet. We need a frame of reference to show this...

...and what better frame of reference for a dinosaur than the image of a human being next to it?
I now went back to my original, "posed" skeletal drawing and consulted some online references, courtesy of Matt Wedel of the Sauropod Vertebra Picture of the Week fame. Using Matt's figure of relative size, I found and scaled the image of a girl from an online image library.
I now went back to my original, "posed" skeletal drawing and consulted some online references, courtesy of Matt Wedel of the Sauropod Vertebra Picture of the Week fame. Using Matt's figure of relative size, I found and scaled the image of a girl from an online image library.

I eliminated every other detail, only scaling the girl to her relative size next to the creature on an A3-sized paper and reducing her opacity to 15%.

I then printed the scaled image and once again, went to work on it with my set of pens. You may ask why I didn't simply print the image of the girl on any piece of paper and draw her independently. The answer is line weight - the girl would have looked pasted-on if I'd drawn her at a bigger resolution and scaled her down.

Drawing people is difficult, much harder than it appears at first glance. Even experts of palaeoart will get stuck when rendering convincing-looking human figures. A simple slip of the line will push human figures into uncanny valley territory - we are simply too keen on what a person should (and shouldn't) look like. This goes to show that with extinct animals, their true appearances safely lost in the oblivion of time, artists are actually making mistakes and assumptions all the time.

I carry on with my drawing of the girl much like I progressed with the animal figure, laying down my lines and indicating where I have to make corrections. With reference figures, I always try to have friendly-looking, self-confident girls as models. I don't like unnecessary nudity or sexism in my figures either. Cute, "girl next door" types and antediluvian monsters are the thing for me; perhaps there is something deeply psychological at work here.

With the drawing complete, I scanned the image of the girl at a similar resolution, and placed her next to the Brachytrachelopan.

The cleaning and thresholding of the girl proceeded much like the Brachytrachelopan figure.

I spent a lot of time on the figure, partly because I like painting women, and partly because I want the final image to look more realistic. Ideally, one should spend as much time on the "scale figure" as the main creature itself.

Here is the finished scale figure. Drawing details of hair, eyes, clothing, etc. on a woman is almost as fun as drawing the crests and scales on an extinct animal.

A few final, final adjustments, and the piece is ready for publication.

I took a colour print to see the final version. Success!


The truth is, every artist is a learning artist and every illustration and sketch teaches us new things.
I hope you've enjoyed my Brachytrachelopan illustration, and I'll be very happy if you try to emulate the styles and techniques I've shown here. Ultimately, however, every artist has their own spiel, and this was mine, so far. Enjoy!
Update - 2018:
Since it was first published, many people have used this tutorial to create their own dinosaur-themed artworks. I am so proud! Here is a brief sampling:
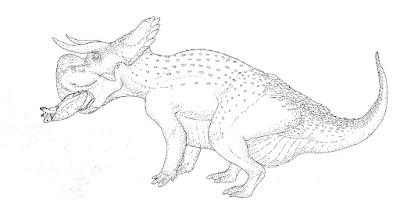
Murusraptor and Gualicho by Ashley Patch.
(Ashley has been a long-time follower of my works, and emulated my style before this tutorial was published.)
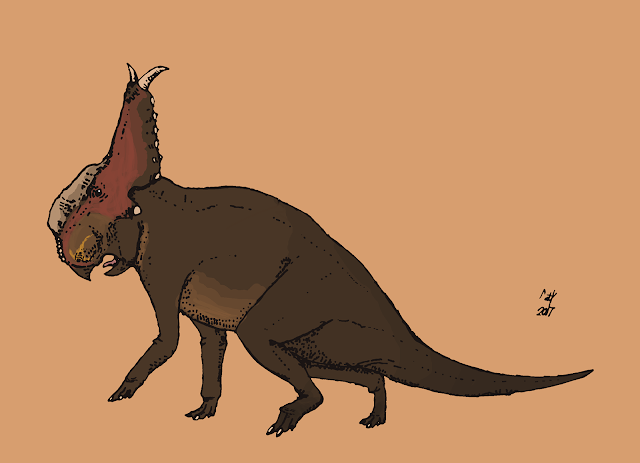
Pachyrhinosaurus by Matt Mc Carthy.
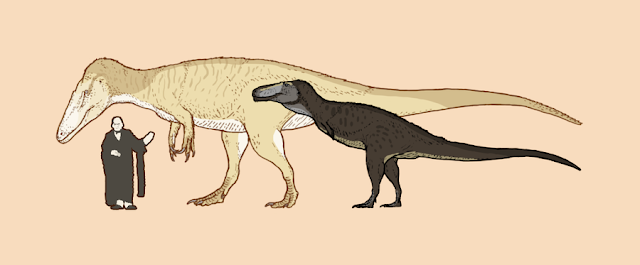
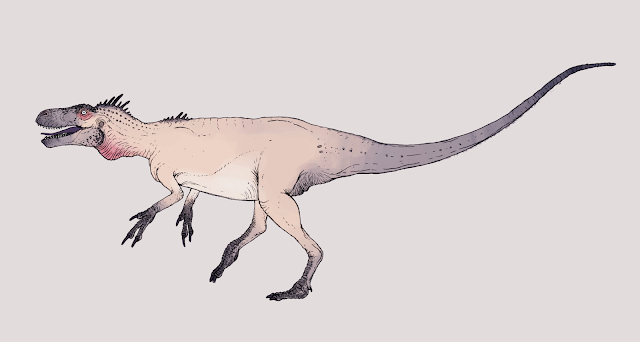
 Tyrant Swinger, Allosaurus by Midiaou Diallo.
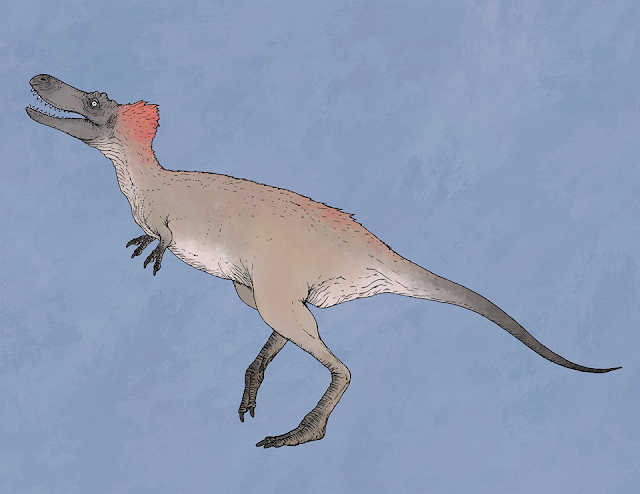
Eotyrannus by Jakub Bobrowicz.
Gorgosaurus by Jakub Bobrowicz.
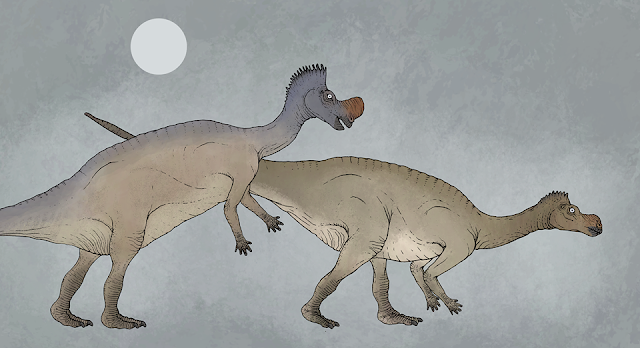
Muttaburrasaurus Couple by Jakub Bobrowicz.

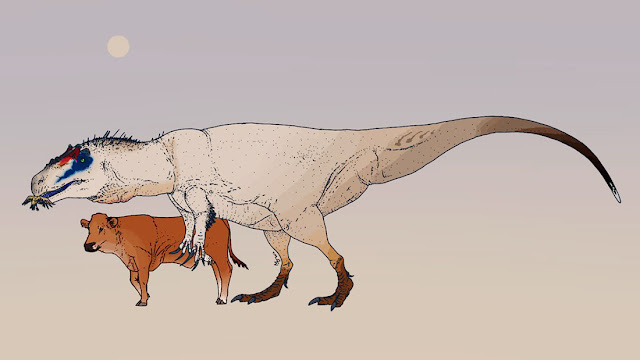
Tyrannosaurus, Monarch of Hell Creek by Ahmed Abdelsalam.I hope you've enjoyed my Brachytrachelopan illustration, and I'll be very happy if you try to emulate the styles and techniques I've shown here. Ultimately, however, every artist has their own spiel, and this was mine, so far. Enjoy!
Update - 2018:
Since it was first published, many people have used this tutorial to create their own dinosaur-themed artworks. I am so proud! Here is a brief sampling:

Murusraptor and Gualicho by Ashley Patch.
(Ashley has been a long-time follower of my works, and emulated my style before this tutorial was published.)
Pachyrhinosaurus by Matt Mc Carthy.
Tyrant Swinger, Allosaurus by Midiaou Diallo.Eotyrannus by Jakub Bobrowicz.

Gorgosaurus by Jakub Bobrowicz.

Muttaburrasaurus Couple by Jakub Bobrowicz.


Perhaps thanks to the popularity of this article, a gallery of my palaeoart has also been featured in a "click-bait" content site.
www.cmkosemen.com